Creating an accurate customer estimate is as simple as describing the job, running the Autocomplete, and generating and emailing the Quote.
Want to see it work? (30 second demo)
This guide breaks the quoting process down further and shows you where you have additonal input and control over your estimates.
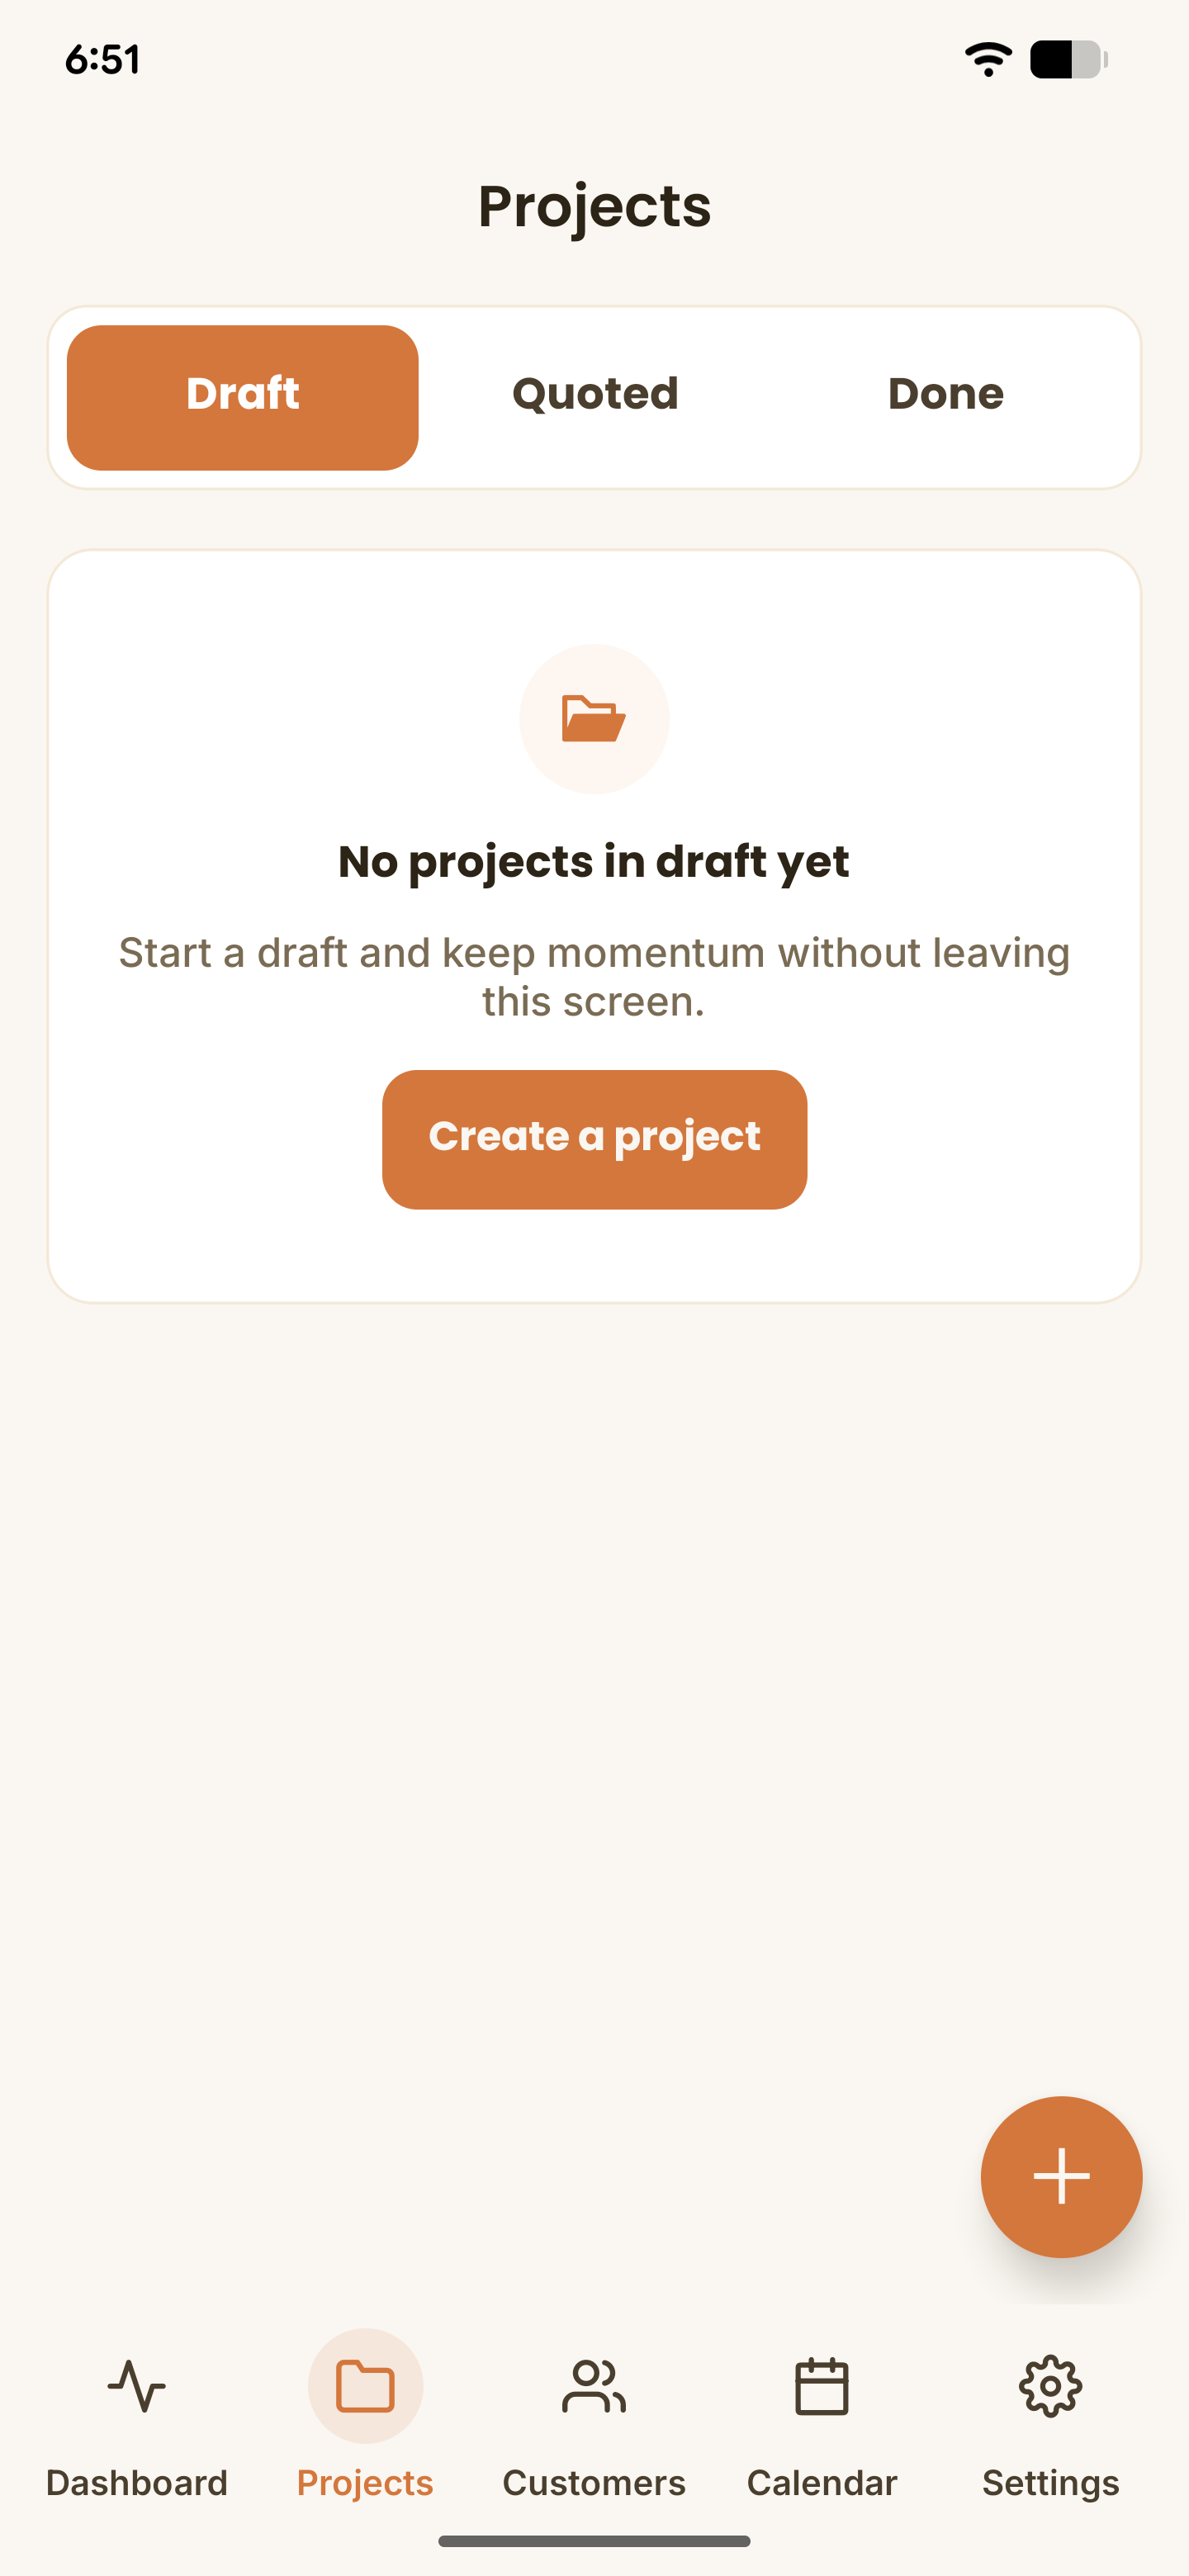
1. Start a New Project
re:Quoted's primary focus is to help you price your jobs quickly - estimating accurate materials, labor, costs, and taxes from just a short job description. Here's how to turn your onsite notes into a professional sent quote.
- Open the re:Quoted mobile app and select the projects tab on the bottom menu.
- Tap the "Create a project" button, or press the '+' button in the bottom right corner.
2. Describe the Job and run the Autocomplete
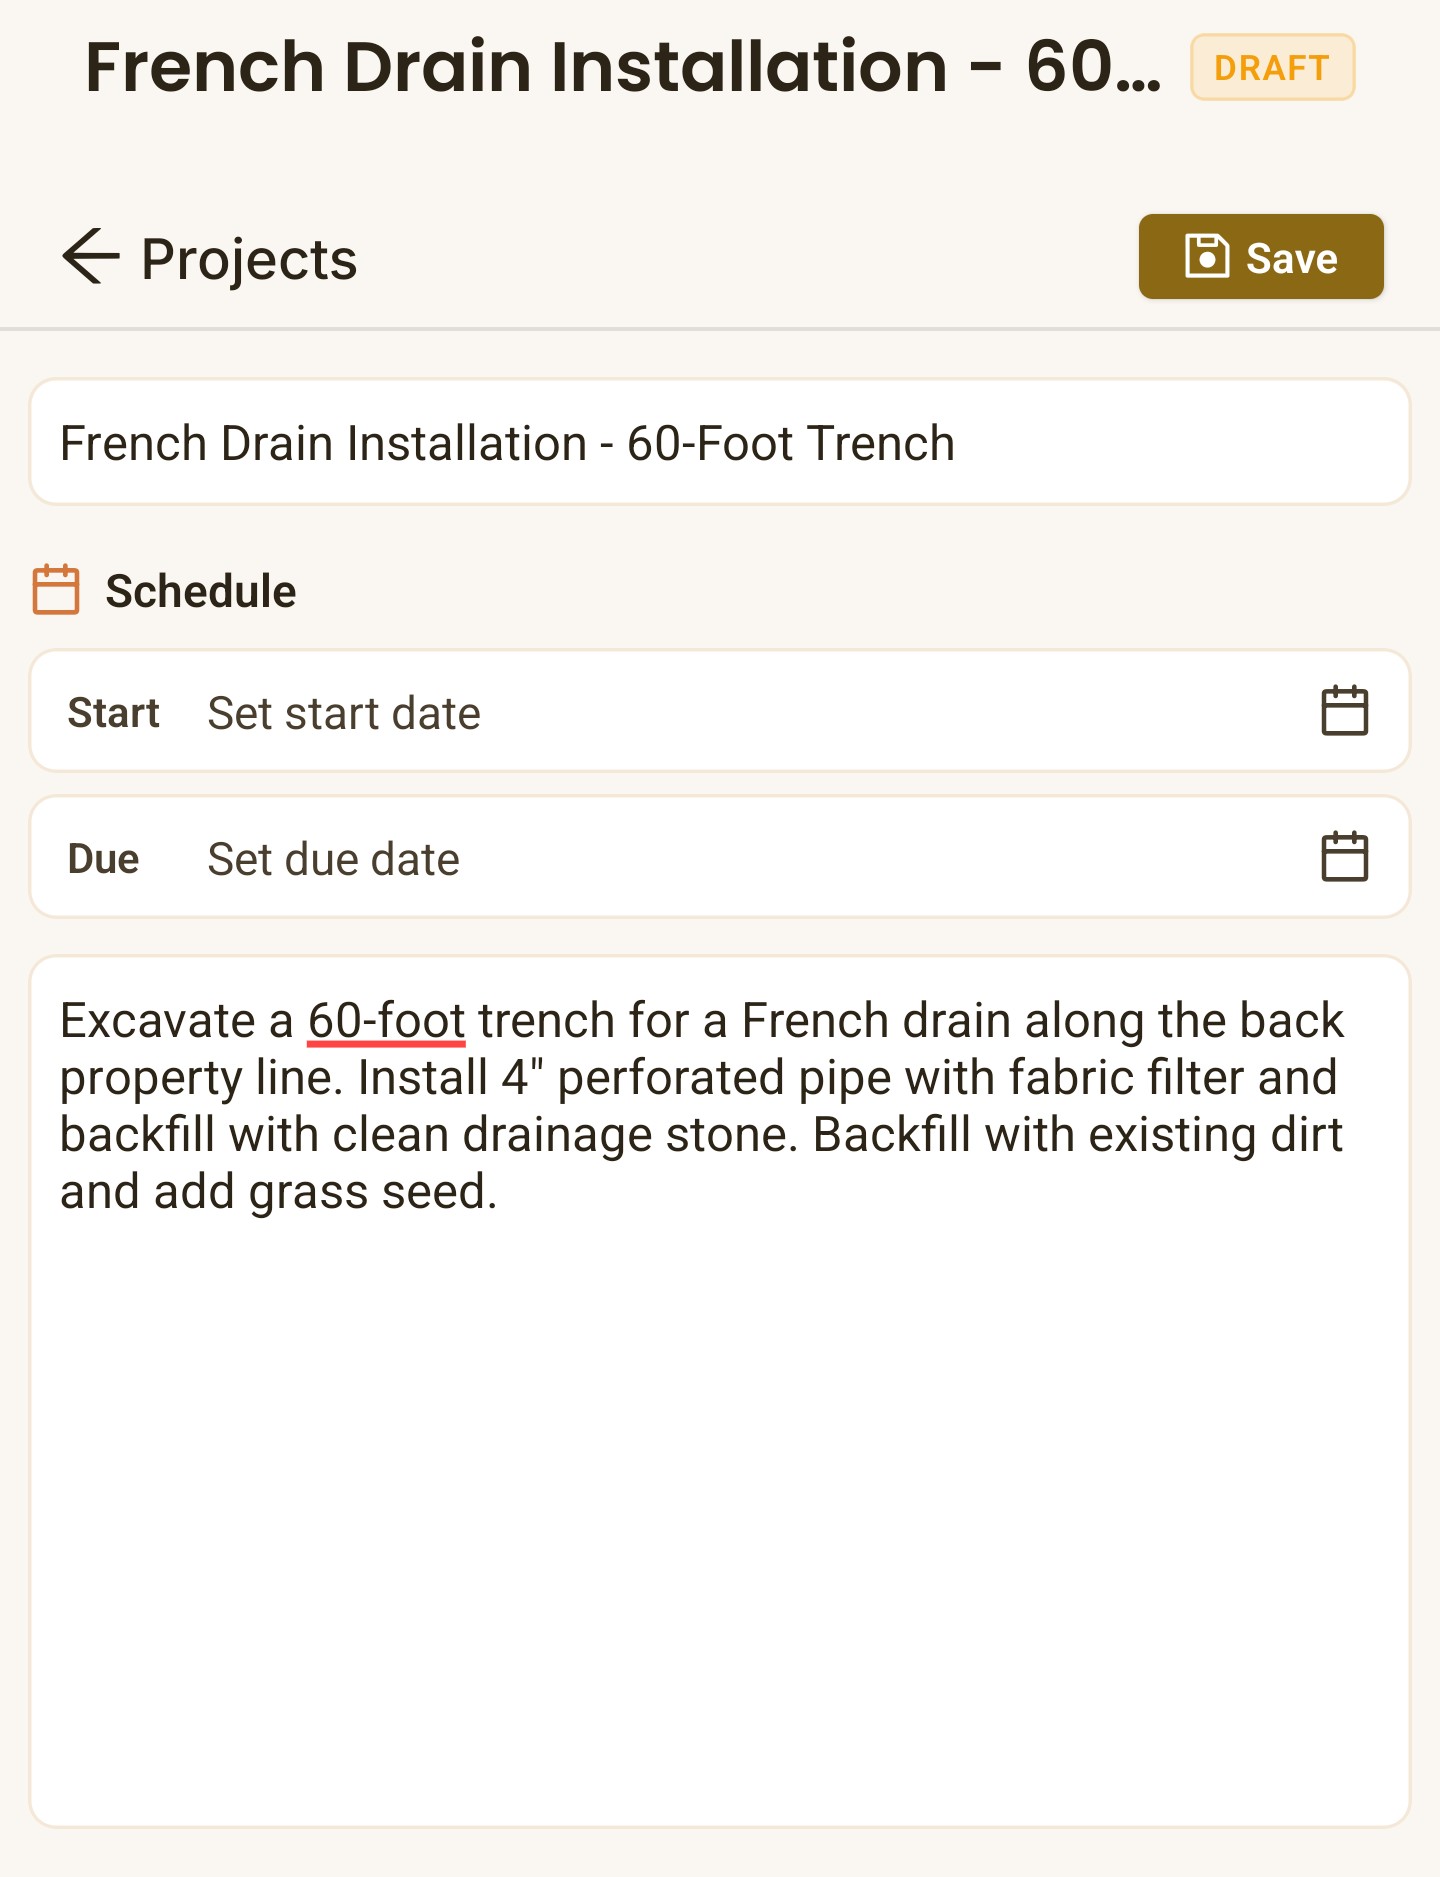
You don't need to manually type out every screw and wire. Just talk or type naturally.
- Type or speak your job notes in the project description. This is not visible to customers, it just tells our quoting engine what you're working on.
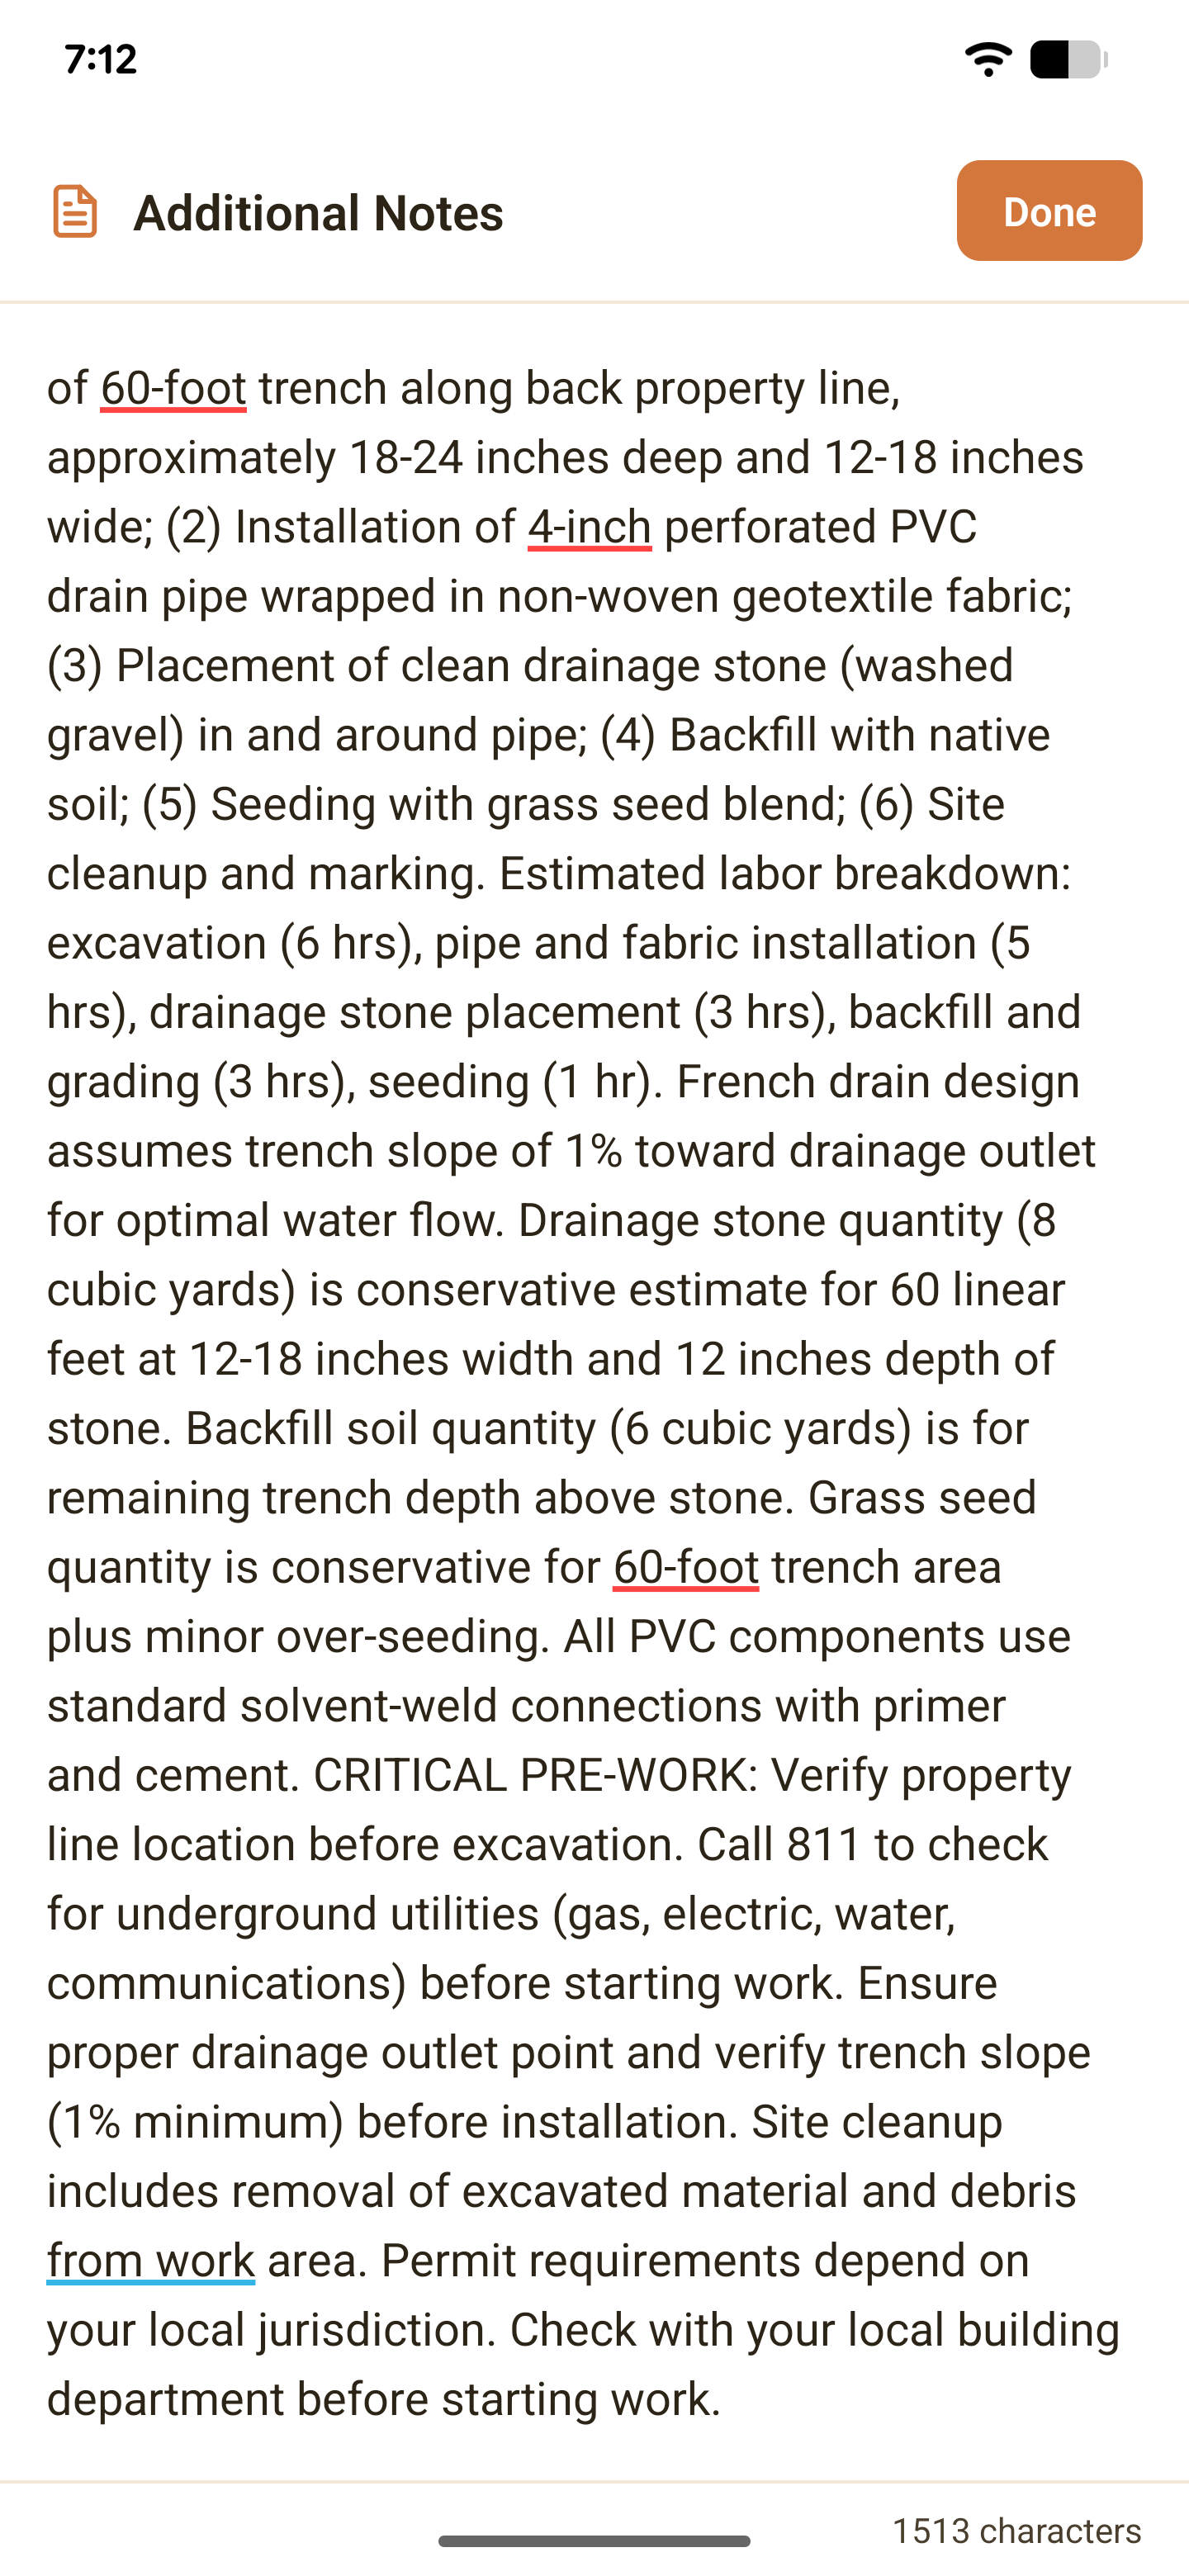
- For example you could type, "Excavate 60-foot trench for French drain, install 4" perforated pipe with fabric filter and backfill with clean drainage stone. Backfill with existing dirt and add grass seed."
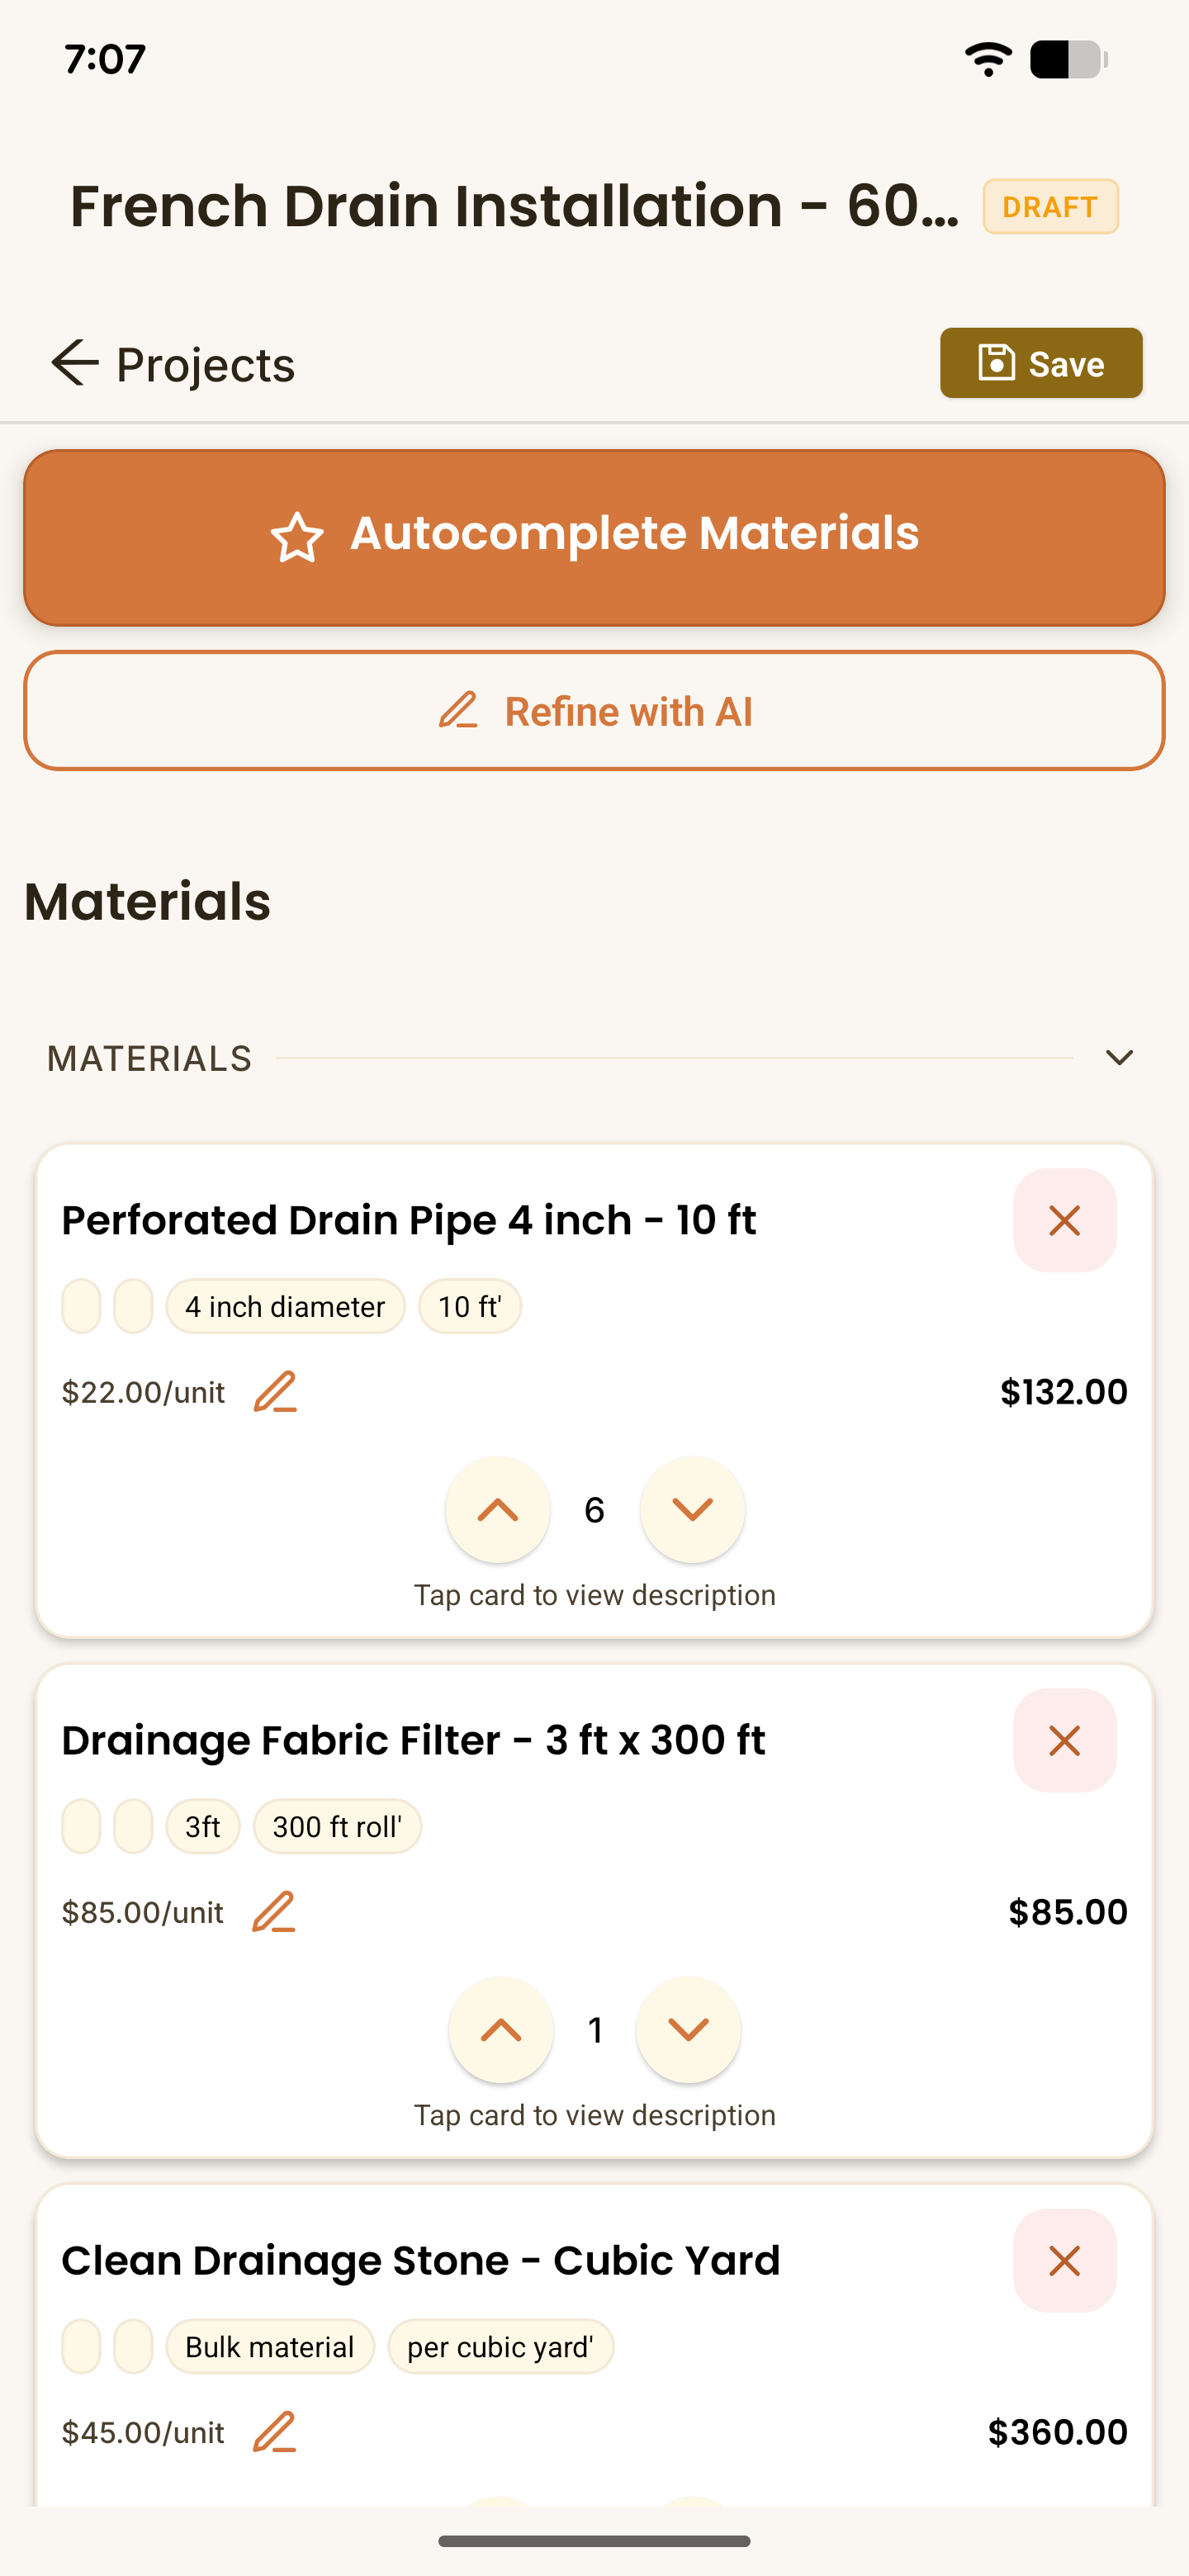
- Press "Autocomplete Materials" and watch re:Quoted do the work estimating your job scope, materials, quantities, and labor for you - this usually takes under a minute.
Tip: The quoting engine only needs a couple sentences, but the more detail you provide the more it can tailor the quote to what you want. Think of it like an employee, you can tell it to make a quote, or tell it to make a quote with specific materials, brands, or details.
Tip: Before running the autocomplete you can add a project title, otherwise, the Autocomplete will create a title based on the job.
3. Check the Breakdown
Before the customer sees anything, you get to review the math.
- Review the generated list of materials and labor hours.
- You can quickly increase or decrease material quantity using the arrows, or use the edit pencil to type a new quantity or price.
- To delete a material, just click the 'x' in the corner.
- If you want the AI to make changes, use the Refine with AI button. You could say, "Add two more 4" drain pipes as a backup", or "Customer has asked for beauty bark, remove the grass seed and add enough bark to cover the area." The AI will make these specific adjustments without touching the rest of the quote.
- You can also manually search for materials saved in the re:Quoted database using the Search and 'Add Material' button at the bottom of the materials list.
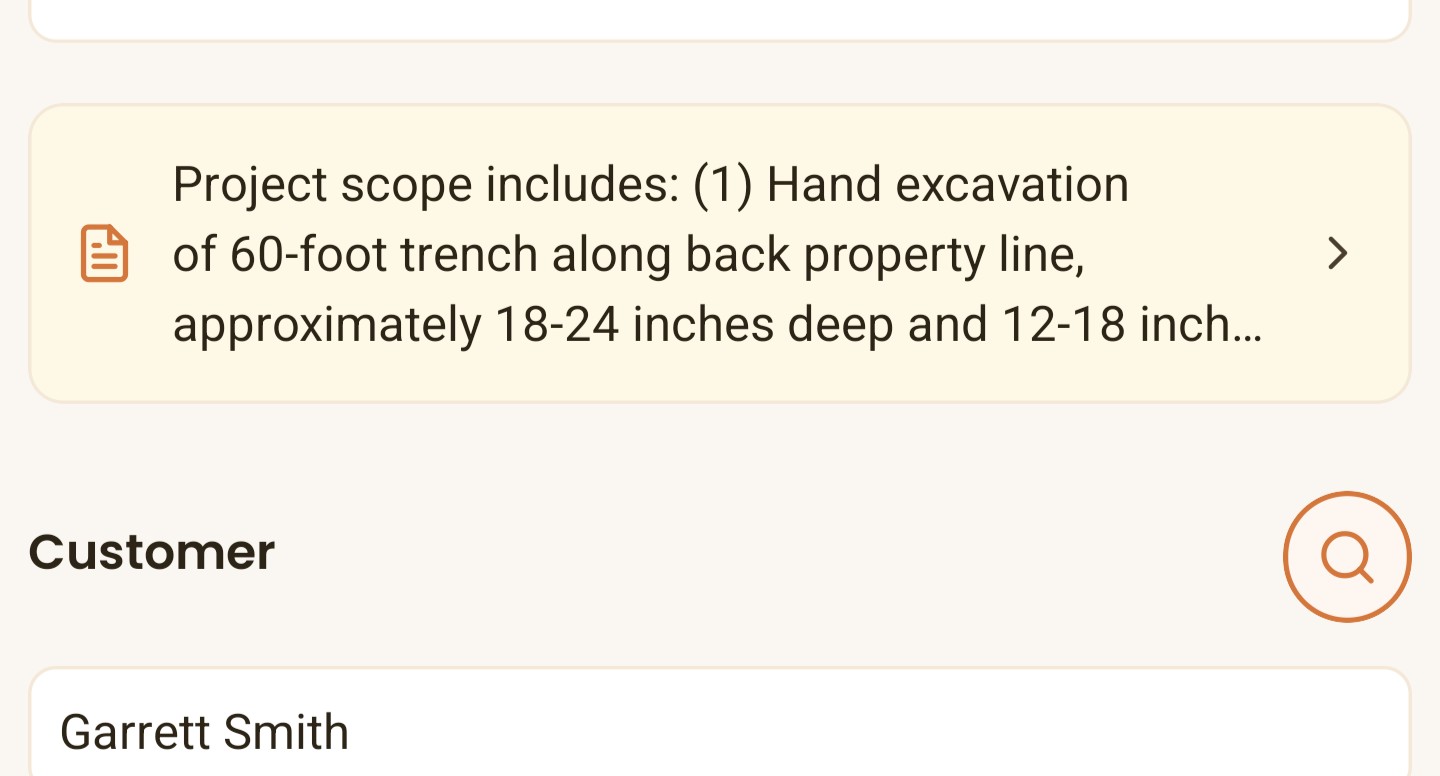
Tip: re:Quoted estimates the scope of work which to figure out what's needed for the job. This scope populates right below the project description in the notes section.
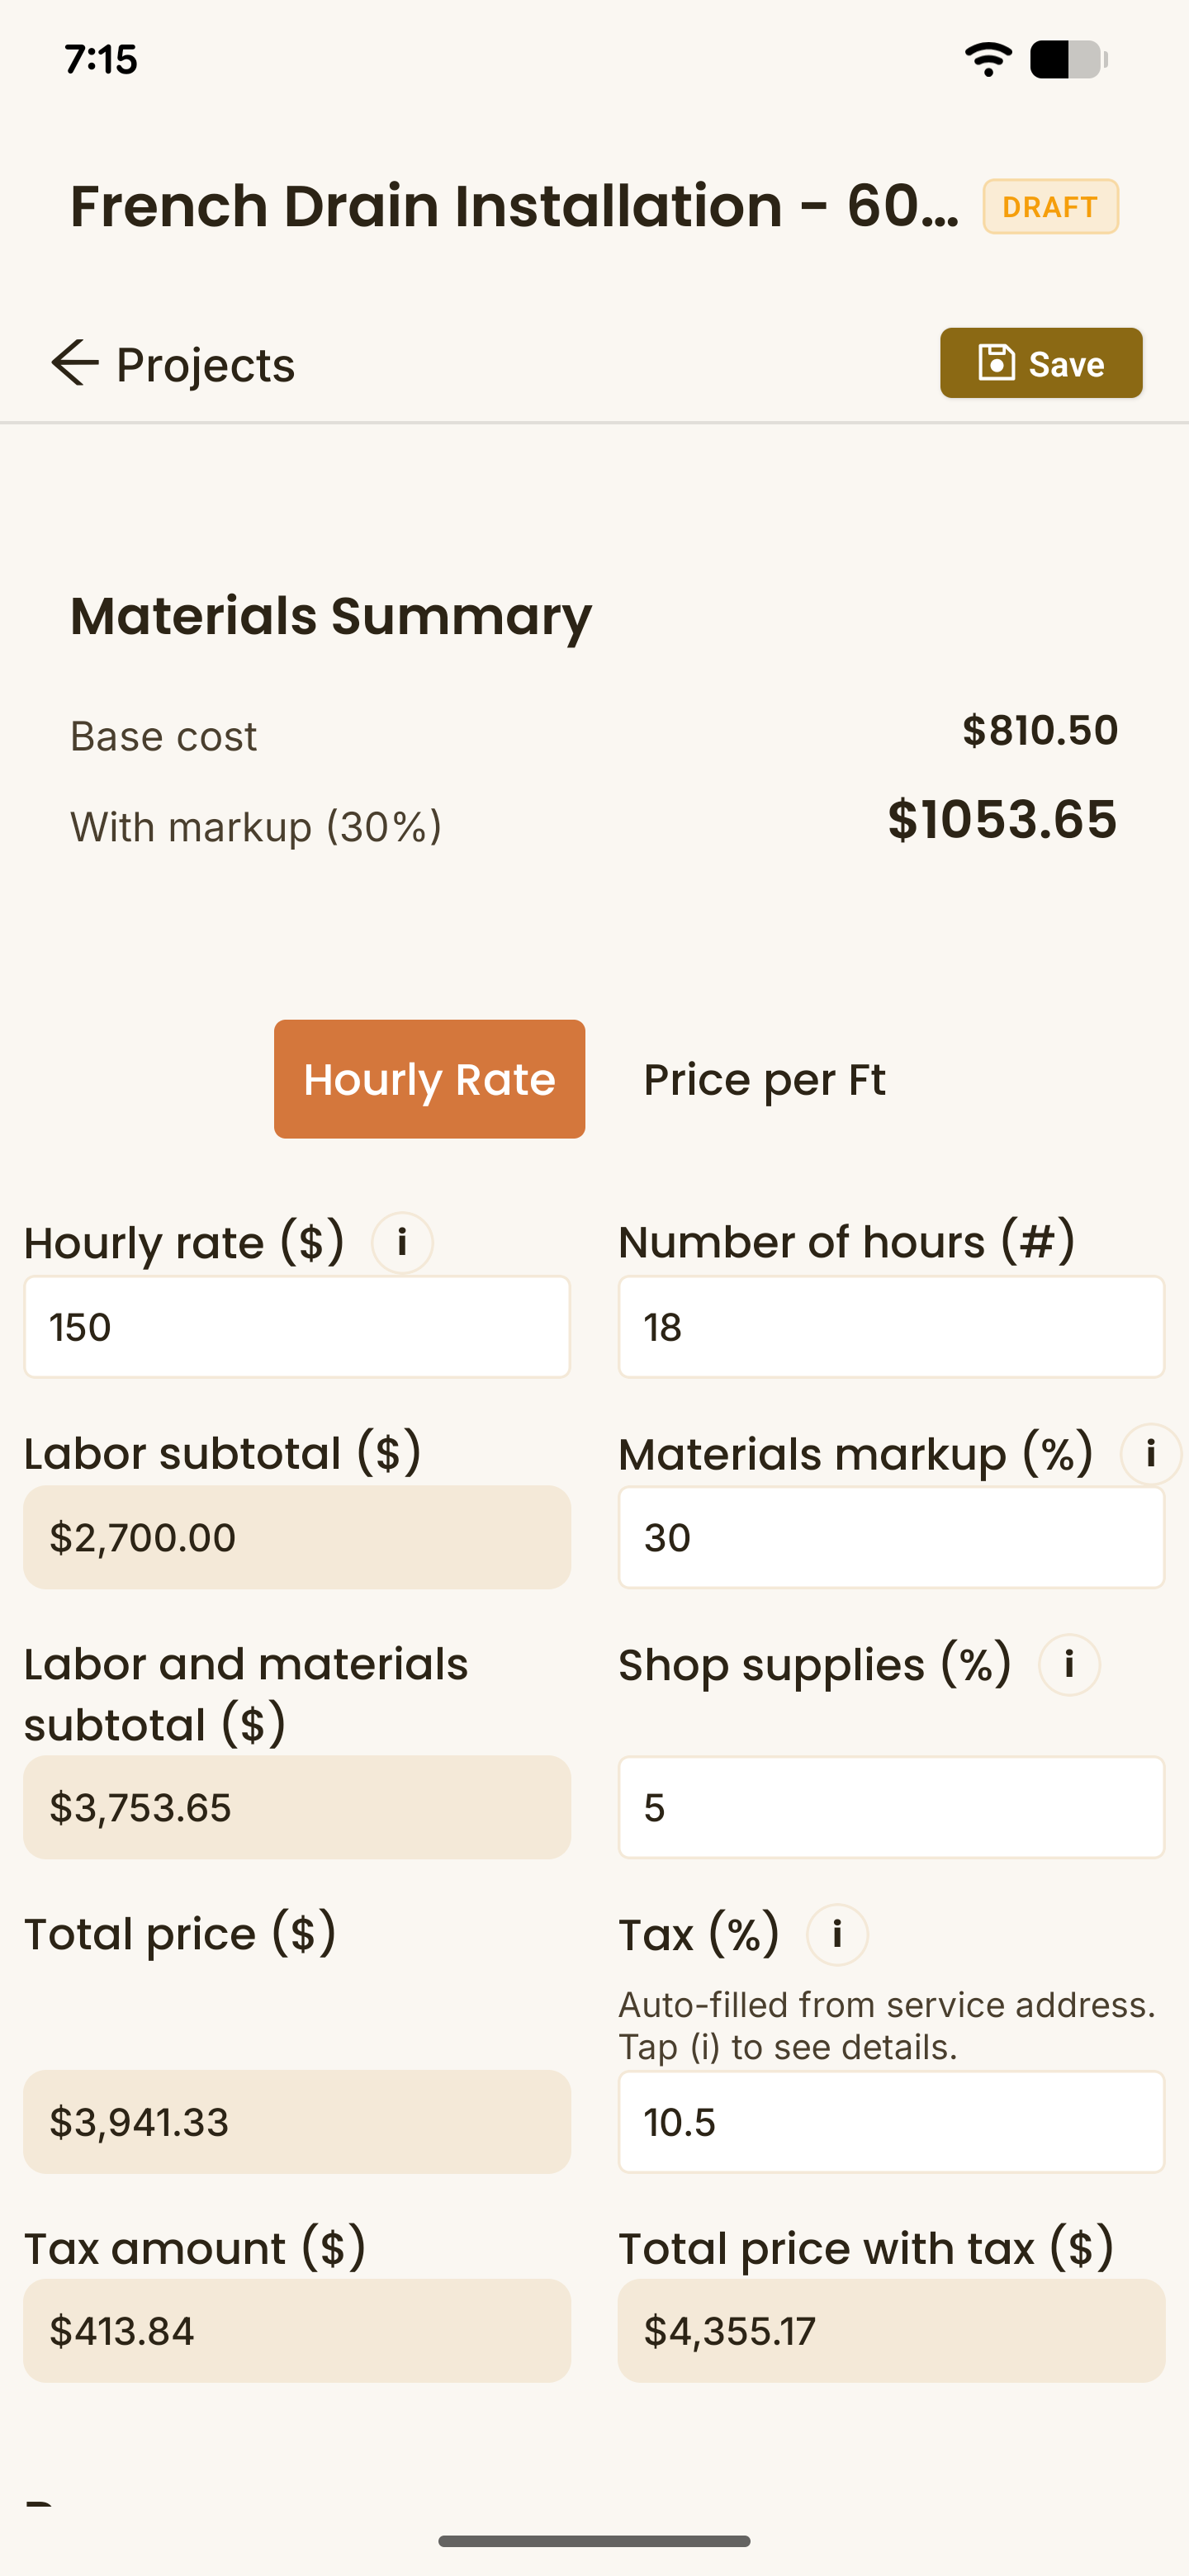
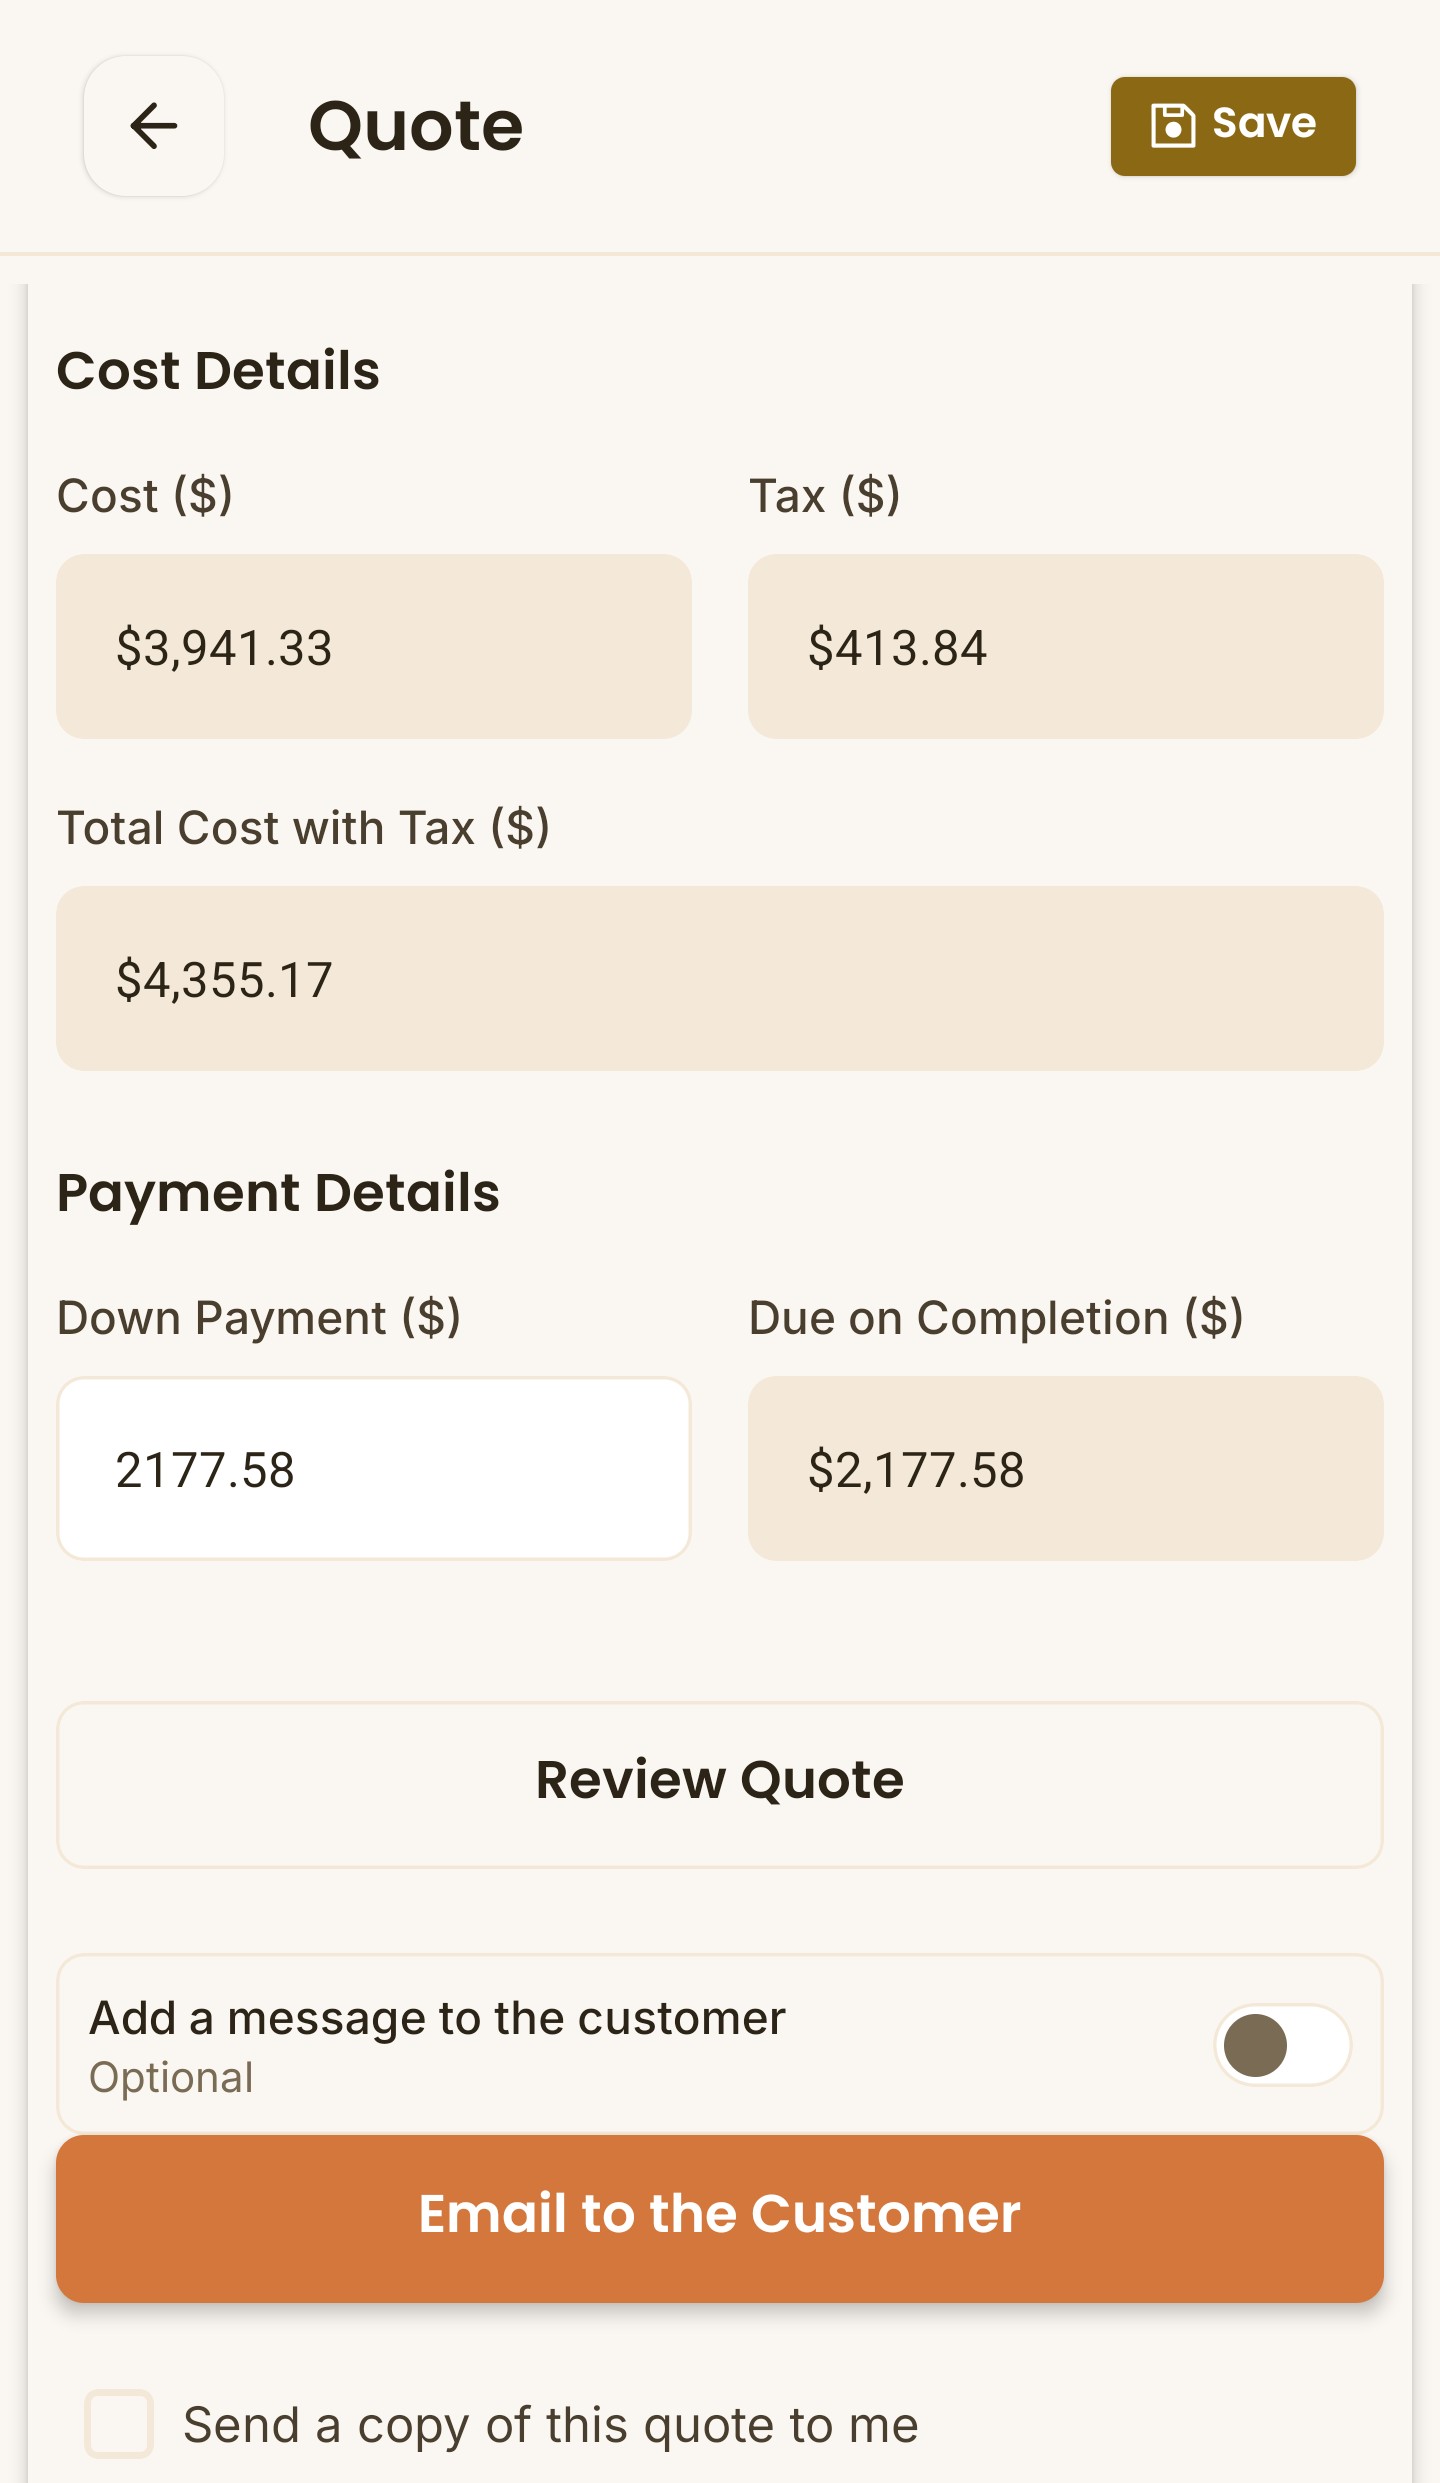
4. Review Final Calculator
- The calculator automatically pulls in your preconfigured rates and markups.
- You can adjust these per job, like if this job requires extra equipment at a higher labor rate, or if you need a little more profit on materials to cover the drive distance.
- The Tax (%) is automatically pulled in from the customer's zipcode, but this can be adjusted for non-taxable jobs.
5. Final Touches
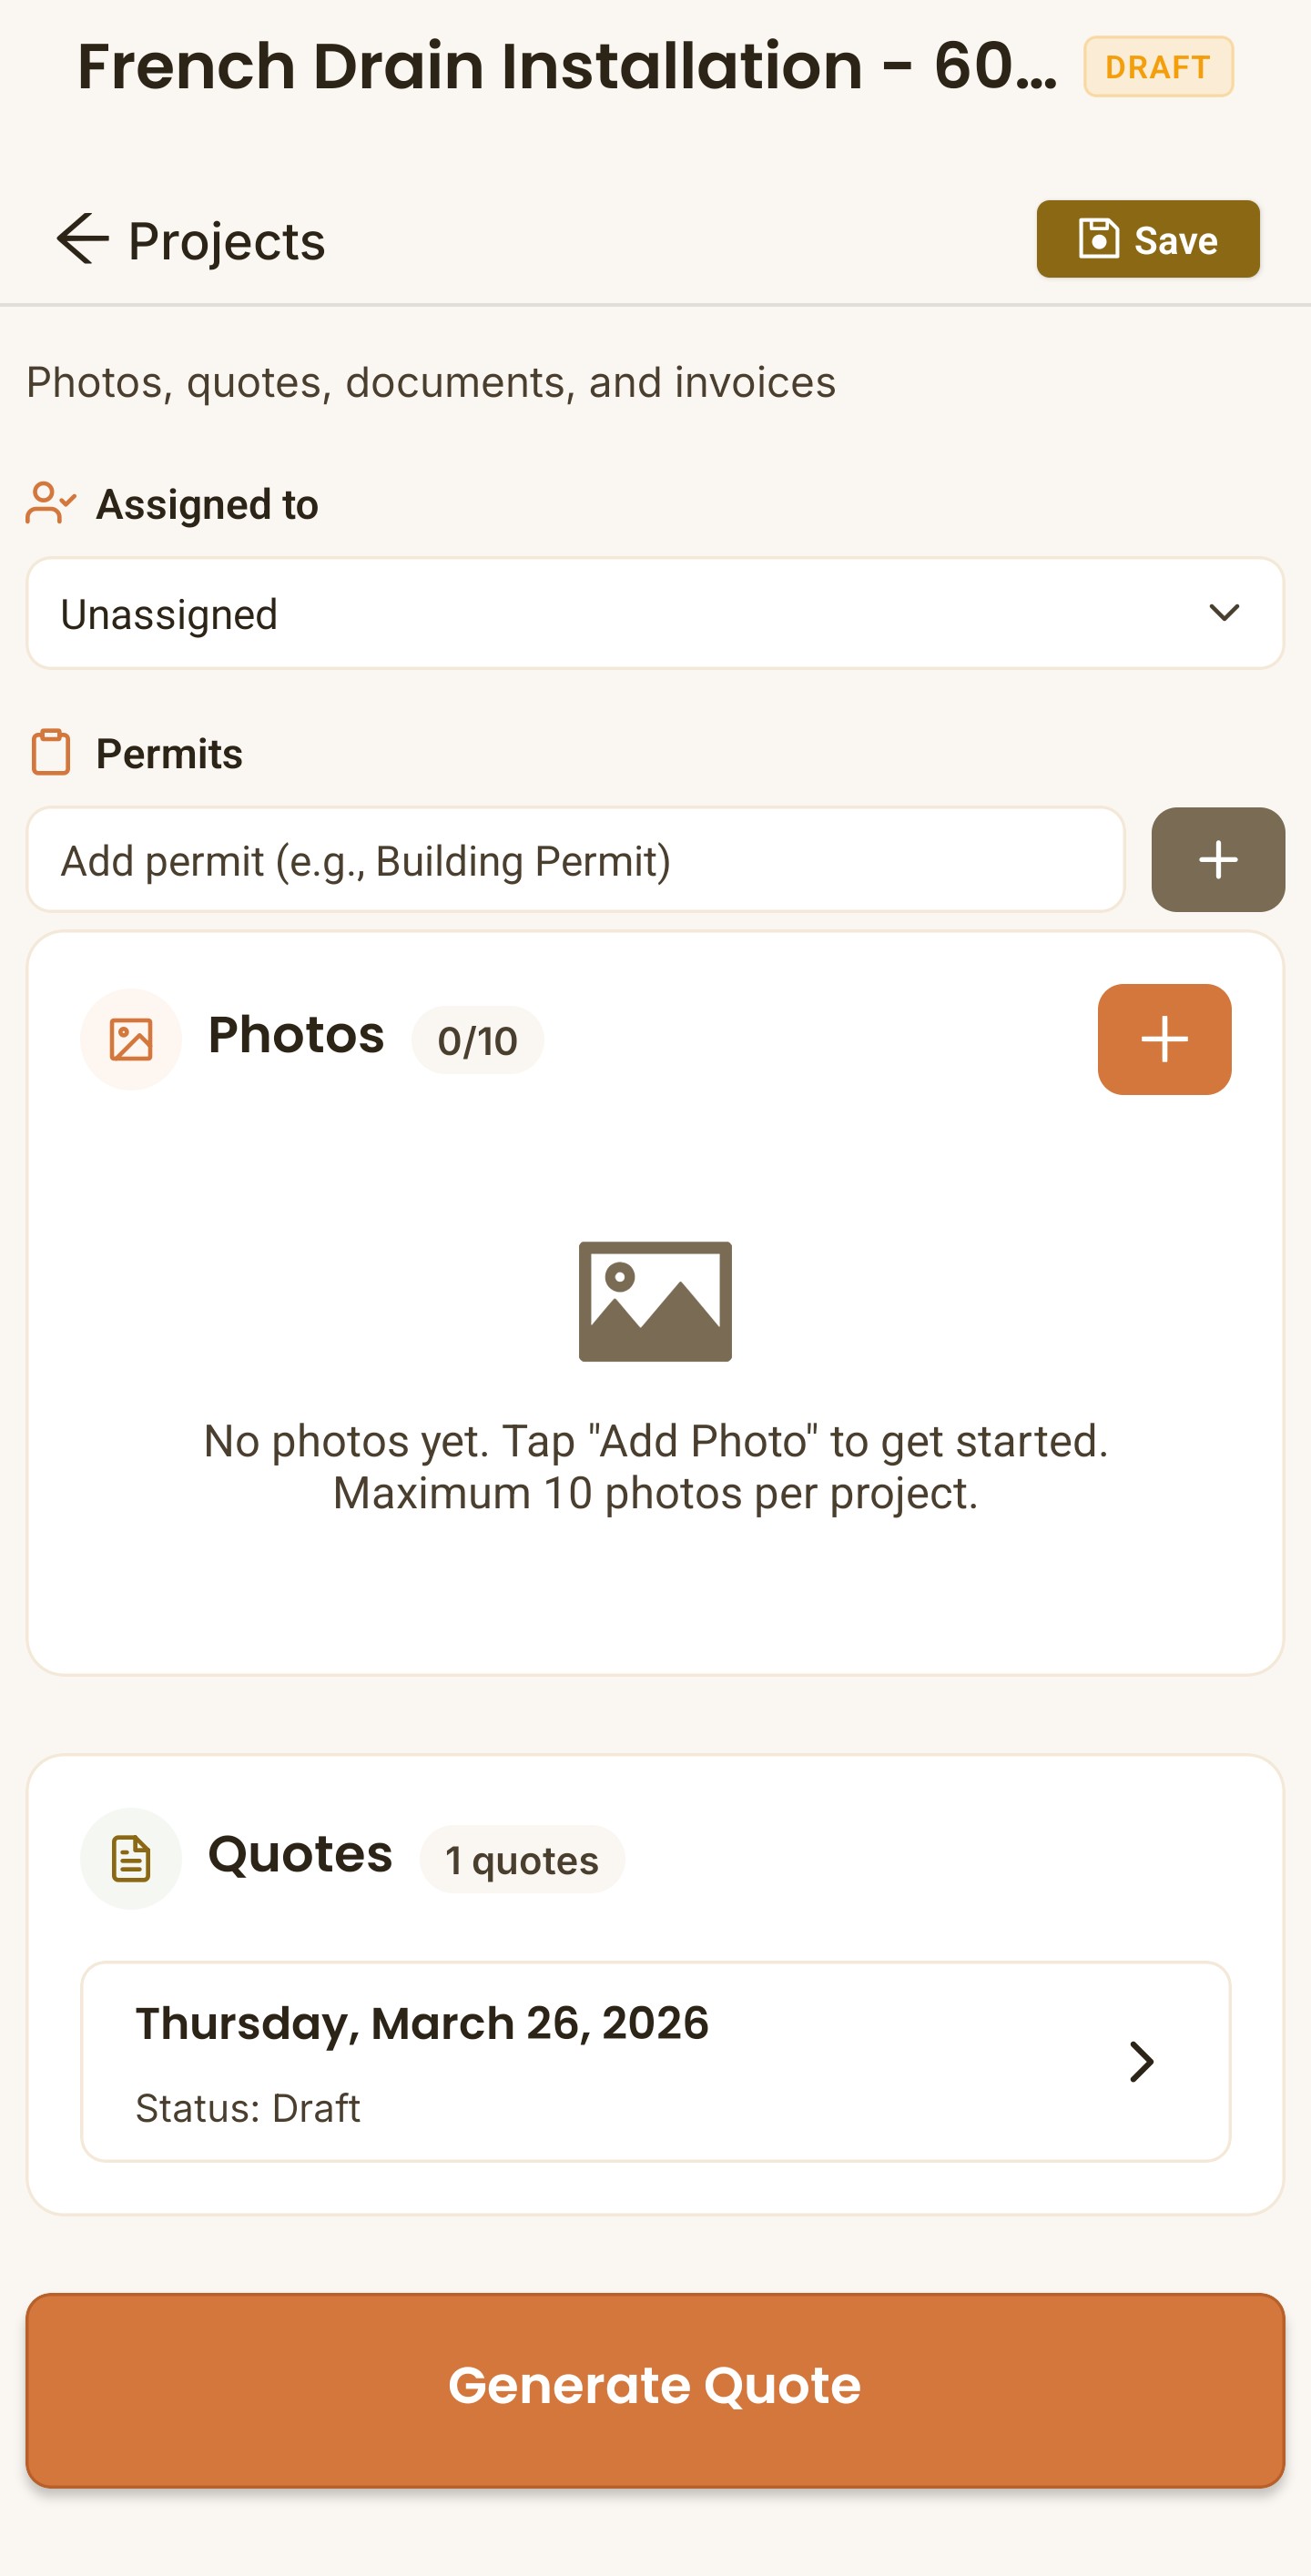
- If you haven't already, add a customer from your existing customer list or create a new one. This step is needed to calculate the tax rate and send the quote.
- You can adjust the Start and Due dates at the top of the project to see the job appear on your calendar.
- Assign the job to a crew member, add permit information, and add Photos of the job directly to the project for tracking.
- That's it, everything related to this estimate - from your job notes to the final price - can be seen on one page!
- Once the totals look good, click "Generate Quote"re:Quoted will automatically create a ready-to-send estimate.
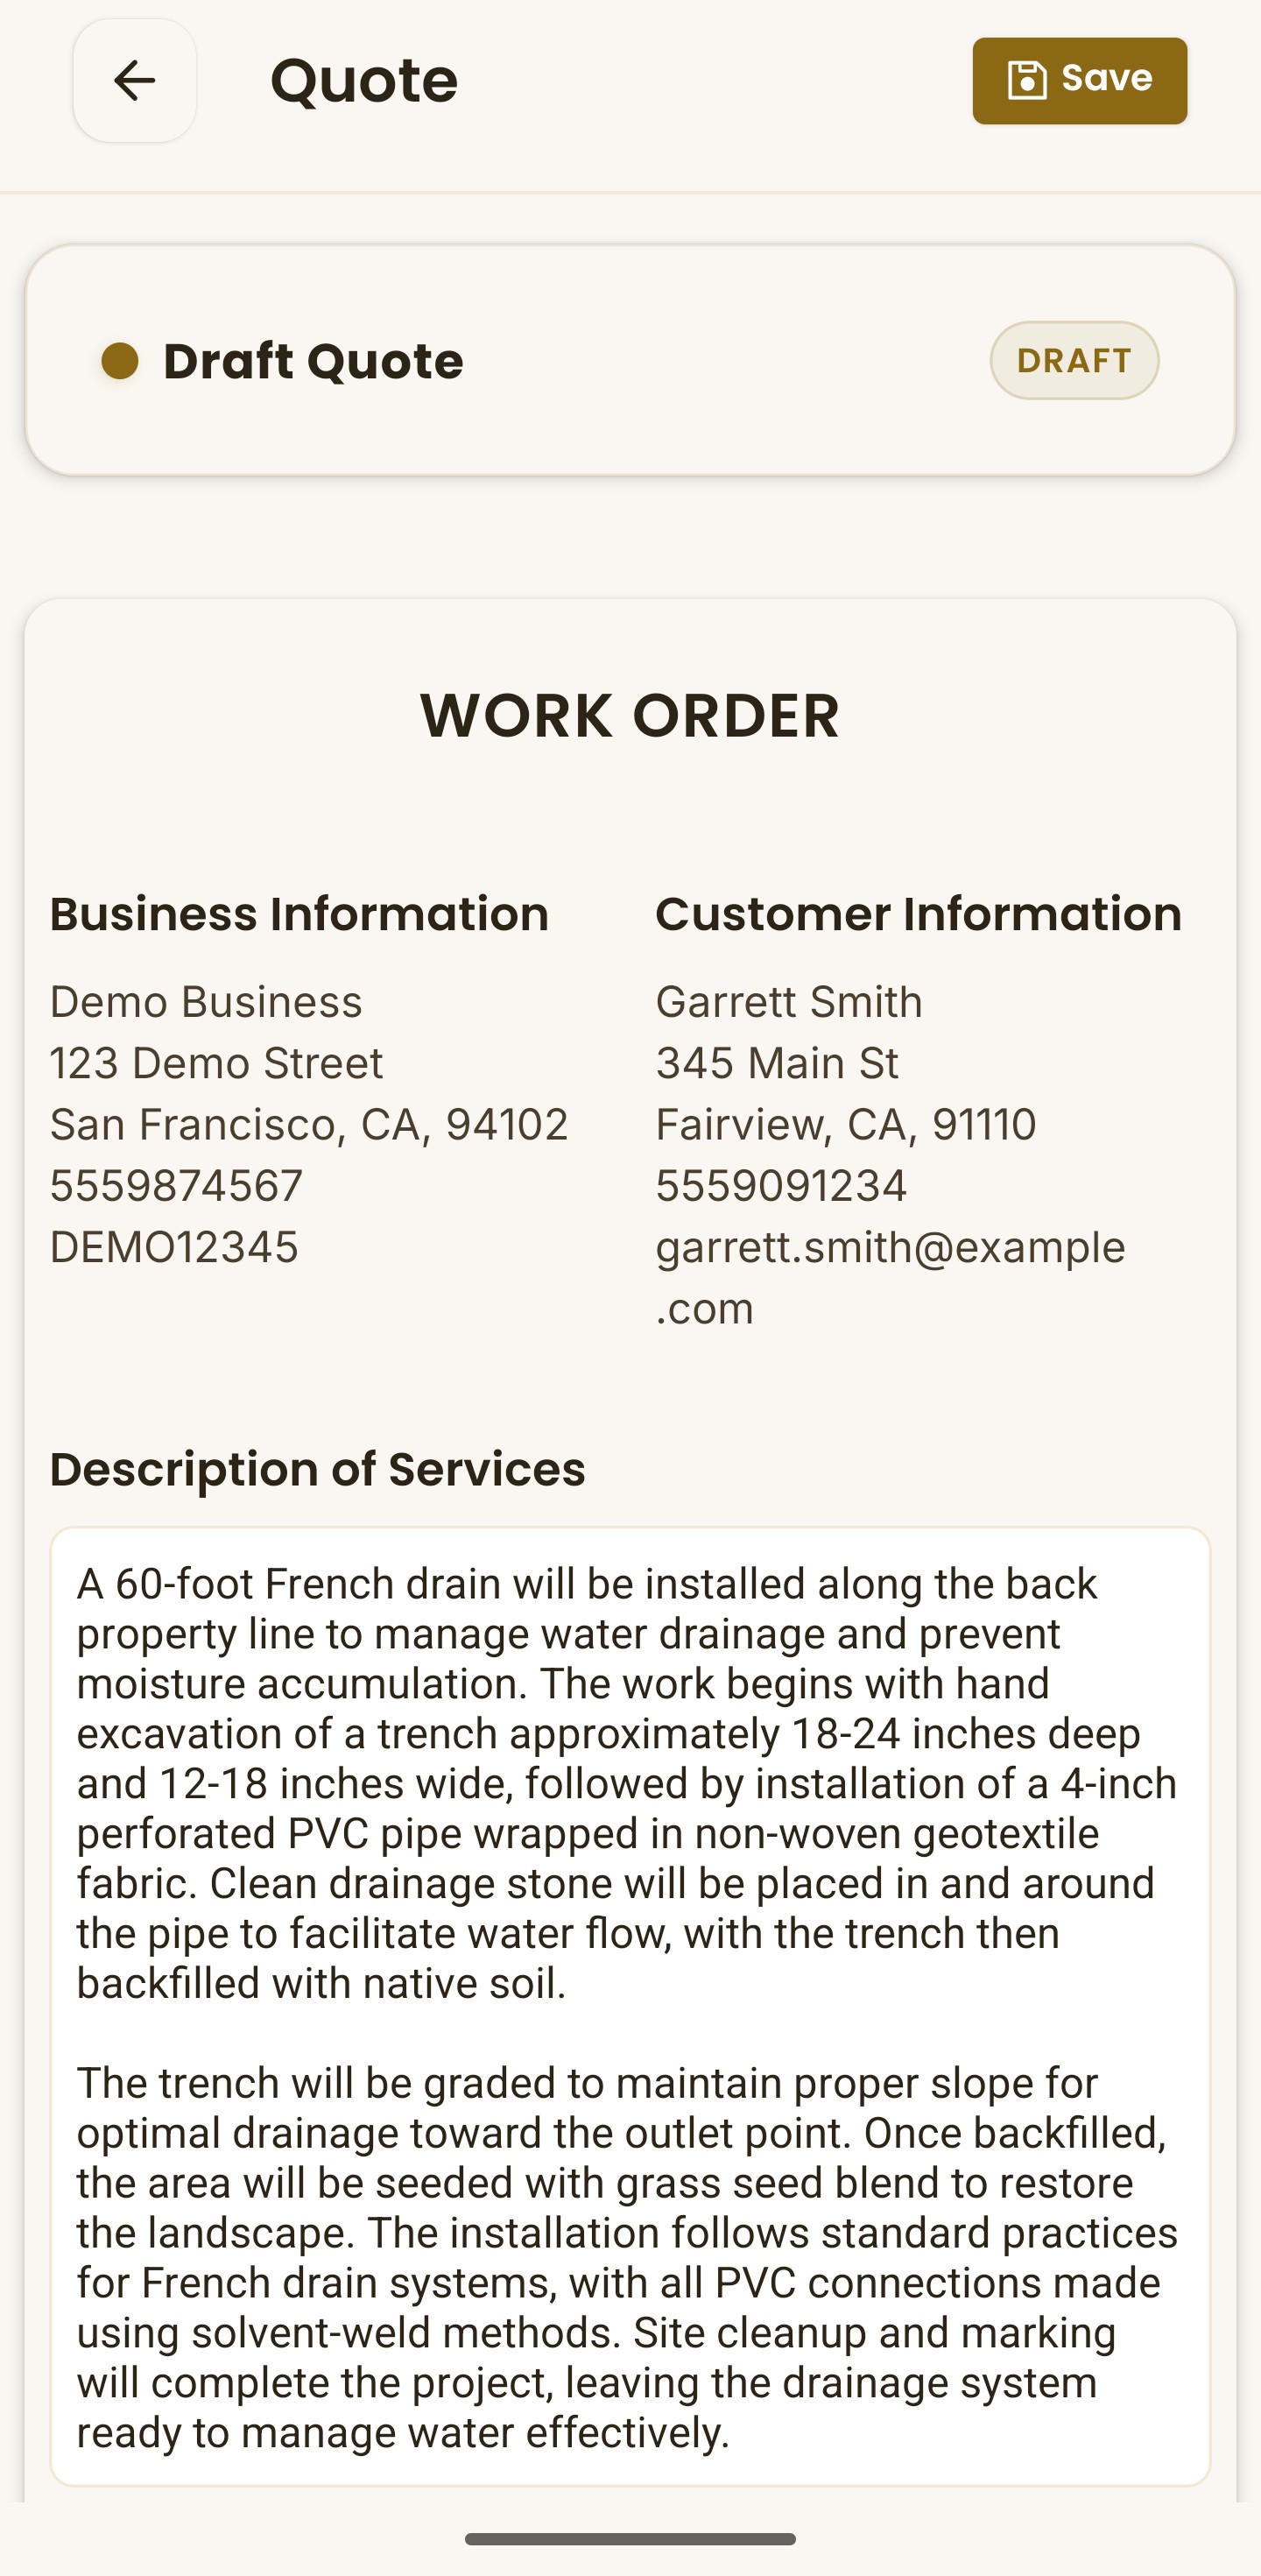
6. Send It Instantly
- After generating the quote, you will be able to review and edit the Description of Services
- The Disclaimer and Warranty are pulled in from your preconfigured Business Settings. Once you save your customer contract in your Business Settings, they will appear on every quote you send.
- Finally, just tap "Email to the Customer".
- That's it! You're done before you even leave the driveway.
Want to see how to manage your business end-to-end? Learn about re:Quoted's suite of CRM featuers